Sunday, May 30, 2010

Guilt Free Sorta Red Velvet Cupcakes

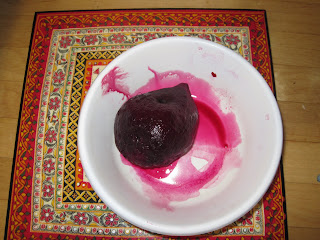
I promised I would show another use for those roasted beets. Well here it is...Sorta Red Velvet Cupcakes!

I absolute love Red Velvet Cupcakes when I want to splurge. But I was terribly disappointed to discover that there was no magical secret to RVC. Its just a regular cake with red food dye. A little background on my personal feud with food dye...growing up I was IN LOVE with basically any sort of food that came in an electric or ungodly bright color. From electric blue ice cream with those bubble gum pieces in it, to radioactive orange KRAFT macaroni and cheese. I think I felt that something with such an unnatural color to it had to have some sort of special or magical ingredient that made it awesome. When I discovered that in general it was something as boring as food coloring, and the only thing special about it was the unpronounceable chemicals that created it, I was MAD. This was basically the equivalent of being told Santa was basically a misguided and probably mentally unstable burglar with an overeating disorder (Big thanks to my older brother for clearing up that misrepresentation). So now here I am trying to recreate one of my favorite treats without giving into the evil food dye.

BACKGROUND: I did ALOT of research to figure out what I could do to bypass the food dye situation, it seemed the general consensus was beets (others included pomegranate juice but that made the cake too bitter, cranberry juice which had the same result, and raspberry puree which really changed the whole flavor of the cake). Having found a way to side step the food dye situation, I was on a mission to find away to make this dish more guilt free so I could enjoy my new triumph without the guilt of having to wear leggings and oversize shirts for a week to cover up my transgression. So the recipe that follow and the variations in the notes is really a frankenstein of recipes. I tried to take the general gist of all the recipes I found out there and created options to fit an array of dietary needs.

NUTRITION FACTS: 1 Cupcake with a "dollop" of frosting (Recipe makes 12 large or 24 small cupcakes NOTE: For these nutrition facts I made 12 large cupcakes)
grams: 88; calories: 253; fat: 12g; saturated fat: 1.5g; carbs: 30g; protein: 7g; fiber: .2g; sodium: 458mg; sugars: 10.5g
Frosting (Recipe makes enough to frost anywhere between 20-24 cupcakes with 1 "dollop" NOTE: I saved the extra frosting to have with cut fruits, nutrition below is for roughly one "dollop")
grams: 27g; calories: 65; fat: 2g; saturated fat: .5g; carbs: 8.5g; protein: 2g; fiber: 0g; sodium: 130mg; sugar: 8g

Cupcake Ingredients:
1/2 cup canola oil *Can use olive oil or vegetable oil instead
1 cup fat free greek yogurt * Can use low fat buttermilk, low fat or fat free plain yogurt or if you keep kosher and want this to be pareve, use nondairy milk and add a dash of lemon juice and white vinegar. The key really is the sourness and acidity in whichever variation you use.
2.5 cups all purpose flour *Can use whole wheat flour or oat flour
1.5 cup granulated Splenda * Can use raw sugar or any other sugar substitute suitable for baking
1 tsp baking powder
1 tsp baking soda
1 tsp sea salt * Can use kosher or table salt, whichever you prefer/have around the house
2 tsp good cocoa powder NOTE: I found that my cupcakes didn't really have the cocoa taste that comes with red velvet cake so I would recommend upping the amount of cocoa powder used, experiment to see how much works for you
1 large egg *Most recipes call for 2 eggs, if using 2 eggs then only use 3 tablespoons beet juice from canned beets, DON'T use beet puree. However beet puree gets a deeper red color so if using 1 pureed beet (yields about 1/2-3/4 cup) use only 1 egg. If you want to make this vegan friendly use 1 cup beet puree and not eggs
1 beet pureed *See above for variations
1 tsp white vinegar *Even if you used vinegar with the nondairy milk, you still need this 1 tsp
1 tsp vanilla extract

Recipe:
Preheat the oven to 350 degrees F. In a muffin tin spray with Pam and coat with a little flour or place cupcake liners/parchment paper.

In a large bowl sift together the dry ingredients (flour, splenda, baking powder, baking soda, salt and cocoa powder) until fully blended together.

In another bowl whisk together the wet ingredients (vanilla extract, white vinegar, beet puree, egg, oil and yogurt) until completely smooth.

Combine wet ingredients into the flour mixture using an electric mixer, blending until completely smooth.


Using a 3 ounce ice -cream scoop or large spoon, distribute the batter in the cupcake tins. If you don't have enough tins to make the 24 or 12 cupcakes at once, do this in batches and save the batter in the fridge until ready to use.


Bake in the oven for 20 minutes (since I made 12 large cupcakes I baked mine for about 20 minutes, turned the oven off and then let them sit in the warm oven for another 2 minutes).

Take them out of the oven and let them cool in the pan for about 10 minutes. (As you can see from the photos below, they come out more fuschia than red, but I think if more cocoa powder had been added they would have been a deeper maroon.

There was still a lingering beet smell after they had baked and there was a faint earthy taste to the cupcakes (but it seems I am the only person who noticed the smell and taste). Mainly the cake tasted like sweet zucchini bread or a sweet muffin. The inside is not really as red as the outside, instead it has more of an orange tinge, again I think adding more cocoa or dark cocoa powder (mine was quite light) would get the cocoa flavor and darker color.

Cream Cheese Frosting Ingredients: (NOTE: If you don't want any extra frosting after frosting the cupcakes, then only make half of the recipe)
8 ounces fat free cream cheese *Recipe calls for low - fat cream cheese which is a little softer and moister than fat free cream cheese which required a little more work with the electric mixer. To keep the frosting pareve or vegan friendly, use non diary cream cheese, I really like Tofutti brand faux cream cheese
1/4 cup nondairy butter substitute *I used Olivio again (remember the frosting from a few posts ago), but any nondairy butter substitute will do
1/2 teaspoon vanilla extract
1/4 teaspoon almond extract
1 cup confectioner's sugar *Some claimed that this frosting was not sweet enough and asked for more sugar, its really a matter of preference I think.

Mix together all ingredients (except for the sugar) in a bowl with the electric mixer. Then slowly, gradually add the confectioner's sugar into the frosting until smooth. If the frosting is too thin or liquidy, refrigerate for 30 minutes before frosting the cupcakes. Refrigerate or freeze the leftover frosting for later.
Once the cupcakes are frosted, you can put some in the refrigerator for now and the near future, and freeze the rest for a later sweet treat craving.

Saturday, May 29, 2010

Fennel for yourself

Salad for lunch every day can get very boring and can very quickly derail even the best attempts to diet. I myself have been getting very tired of the usual iceberg/romaine lettuce with onion tomato and cucumber. I saw this recipe for a variation on salads on Giada DiLaurentis' Show on the Food Network. The episode was focusing on light and fresh meals. The salad definitely had an interesting twist I had never tried before so I decided to give it a shot. Giada's recipe can be found on the Food Network website.

The most important and most expensive part of this salad was by far the Fennel bulb. Oh boy was that an ordeal. It never occurred to me that fennel bulbs would not be standard fare for every grocery store (a testament to how spoiled I was in terms of my grocery expectations as a child). After walking (gotta love NY) to 3 local produce markets and 2 grocery store chains, I finally found fennel bulbs at Key Foods. My quest of course came at a hefty price (by student budget standards).
The fennel bulbs were $2.65 per lb. and since I bought two that brought me to a whopping $4. I suppose I can't complain too much since my pallate refused to go another day on iceberg lettuce with onions and tomatoes, and a good salad from the local delis run me about $6-9 a bowl. These fennel bulbs will surely last me much longer than one salad bowl.


Down to the salad. The first thing I did was caramelize the onions. I am only making this recipe for one person since its just me and my lonesome self eating lunch today (In all fairness my boyfriend is being a very good med student and studying the day away). So I sliced up one large white onion. NOTE: If you are just making this for yourself, still use a whole large onion because the onion will reduce down significantly once caramelized. HELPFUL HINT: If the onions is starting to make you cry, quickly rinse the onion under some water to reduce the burning.

In a large stainless steel skillet, heat 1-1.5 tablespoons of olive oil over medium heat. Add the sliced onion, 1 tablespoon of balsamic vinegar, 2 pinches of kosher salt and 1 pinch of ground black pepper. PERSONAL NOTE: Inhaling the cooking balsamic vinegar will burn the insides of your nostrils...trust me). Cook the onions, stirring occasionally until they are a deep golden brown (for me this took a little over 20 minutes). FUN VARIATION: Instead of just using white onions, throw in a few slices of shallot to caramelize with it. The added flavor dimension is AMAZING. Once the onions are a deep brown color set the onions aside to cool for 5-10 minutes.

Giada's recipe includes a recipe for dressing. But if you read my previous blog on the beet salad, you already have made pretty much the exact same dressing, I make a bunch of it and save it for all my salads because it is muted enough to allow the salad's flavor's to shine without overpowering it.

For the salad, Peel and trim the ends of a grapefruit (I only used half for this salad and saved the other half for a snack latter with some splenda sprinkled on top yummm). When you peel the grapefruit be sure to get all of the white rind off because that is intensely bitter and will ruin the salad. Use a paring knife along the membrane on both sides of each segment, free the segments and add them to the salad bowl. NOTE: Cut the segments over the bowl you are going to use for the salad bowl so the excess juices drop into the bowl adding more flavor to the salad.


Next trim and rinse the fennel bulb, cut it in half. Save one half for a later salad or dish. Thinly slice the other half and add it to the salad bowl. NOTE: I happen to be a huge fan of black licorice and old fashioned root beer so I LOVE LOVE LOVE fennel. I realize however that most of the rest of the world does not like those flavors.If you really can't stand the taste of black licorice, consider skipping the fennel.
Peel and thinly slice the cucumber. The cucumber I bought was quite large so I only used half of it and saved the other half for some other time. Finely slice one scallion (mostly the green part if you don't want the strong oniony flavor of the white part). Add these to the bowl. Add any type of lettuce or leafy green you want to the salad. Giada used romaine lettuce, I however used a really nice pre-packeaged mixed herb salad. Toss it all together with the dressing (I used about 1 tablespoon). Then add on top, the caramelized onion and enjoy!!


MOMENT OF TRUTH: Ok, Ok, I know I said that if you are cooking for one to still use a whole white onion. Well I ended up feeling a little overwhelmed by the amount of onions so I just used half and saved the other half for tomorrow's salad.

Nutrition Facts: (without dressing)
grams:468; calories: 187; fat: 7g; saturated fat: 1g; sodium: 101.5mg; fiber: 6.5g; sugar: 5g; carbs: 28.5g; protein: 4.5g

Friday, May 28, 2010

Beet It


I've recently decided to become a crusader for beets. I know, I know, NOBODY likes beets. I used to be one of those beet haters up until a few months ago. My boyfriend's mother likes to make me (maybe she doesn't make it for me but it always manages to come my way whenever my boyfriend is over) this wonderful beet salad with apples, walnuts, shredded cilantro, and apple cider vinegar. I'm pretty sure there is other stuff in it too but that is the general gist of it. So I decided I would give beets a chance. And boy oh boy did I open a can of worms.

I noticed that on Fresh Direct (where I generally like to get all my staple groceries at a fairly decent price. If you're in the NYC area you can get Fresh Direct at www.freshdirect.com), beets were in season and on sale so I figured what the heck I'll go for it. I ordered a bunch which arrived looking much like the ones you see above. In this form the beets are HARD AS A ROCK. I had no idea how to get it from that to the soft gelatinous blood red gems I was used to. After extensive research I found the best method is either to roast or boil them. I love most things roasted so I opted for that route.

NOTE: From here on out is my experience roasting beets. I am sure there has to be an easier way out there.

Not knowing really what to do I decided it was best to start with washing off all the excess dirt and getting rid of the leaves I was sure I wouldn't be using (to be honest they looked wilty and completely unappetizing so even if there is a use for them, I was in no mood to explore that). I left about an inch of the stems on the beets after I washed them. I then rubbed them with a little bit of olive oil, threw in a little sprig of rosemary and wrapped each beet separately in aluminum foil (make sure the packet is sealed all the way to ensure good roasting). I figured that roasting beets would be like roasting most other things and the peel would slide right off. In hindsight, I really should have peeled the beets before rubbing in olive oil and roasting them because once they were roasted it was literally impossible to cleanly peel the beets (I couldn't tell where the beet started and the peel ended!). I roasted the beets (the more beets you are roasting the longer it will take) for about 70 minutes at 375 degrees F. After they were roasted, I left them to cool until they were cool enough to hold, I peeled (aka hacked away) the beets and removed the stems.

This is the end product after laboring away to peel the beets. MAJOR NOTE: DO NOT WEAR ANYTHING YOU WANT TO KEEP NICE AND DON'T WEAR WHITE! This stuff stains real bad.

At this point you can either use the beets, save the beets for later or turn them into a puree. I had three beets so I decide to eat one now in the salad that will follow, save one for later and puree the last one to use for a red velvet cake recipe I plan to make this weekend.

For this particular beet here, his fate was to become part of a delicious roasted pear and beet salad with goat cheese. I absolutely love goat cheese in a salad and I had seen a salad similar to this in a restaurant and decided to try to recreate it.

I had two Comice pears I got free from Fresh Direct as part of their peak produce campaign. So I figured now was my chance. To roast the pears I quartered and pitted them. Then in a 10" stainless steel skillet I heated 2 tablespoons of olivio (you can use any other sort of butter substitute or just regular butter, but I don't recommend olive or vegetable oil because it gives the pears an odd taste and hides the sweet pear flavor. I put the pears in flat side down and cooked them on all sides for about 2-3 minutes each. Really just wanted the Olivio to brown the pears and for the pears to get warm all the way through. One pear (4 Pieces) I put aside to use for salad another day.

For the base of the salad I used organic baby arugula from Fresh Direct (it comes in a sealed plastic container with enough to last me about 4 salads, a pretty great deal at $3.49 a package)

I tossed the arugula with a home made dressing of red wine vinegar, local honey (I bought my honey when I was home in AZ visiting my parents and since it's local the bees get pollen from the local flora and flavor the honey that way, mine happens to have a lovely orange hint to it), I add just a touch of olive oil, ground seasalt, fresh ground black pepper and a dash of lemon juice. I'm not giving measurements because its really a matter of taste and I like to make my dressing a little heavy on the vinegar size and very light on the oil. I also make a large batch and keep it to use on salads or marinades or whatever else I feel like. I highly recommend taking the extra time to make your own dressing rather than buying it from the store, its way cheaper and opens doors to a whole new world of flavors outside of Kraft and Hidden Valley's world. Drizzle about 1 -1.5 tablespoons on the arugula and toss it so all the leaves are coated.

Next slice, dice or chop the beet however you want and layer it on top of the arugula. TIP: If using canned beets, drain them of all the juice otherwise it will overpower all the other flavors, stain your dish and the entire salad and will just make it all soggy. Crumble or simply just place 1-2 tablespoons worth of good plain goat cheese over the beets. The contrast between the red, white and green really looks beautiful . Last place the (now warm) pear slices on top of the beets and cheese and enjoy! When you cut into the pear pieces, you''ll be able to get a fork full of beet, goat cheese and arugula all at once.


NOTE: If you aren't a fan of the earthy flavor/taste of things like spinach, you probably won't like the taste of beets. To make sure the beet flavor doesn't overpower or ruin the salad for you, use half a beet instead of a whole one and add more honey to the dressing or just drizzle some honey over the top once you've placed the warm pears on top. Also note, if you are trying to eat healthy and want to avoid snacking or junk food, this salad is a great choice because the beets fill you up quickly and keep you full for a long time.

Nutrition Facts:
grams: 294; calories: 333; fat: 21g; saturated fat: 10g; carbs: 22.5g; protein: 13g; fiber: 6g; sodium: 570.5mg; sugar: 20g

Thursday, May 27, 2010

Skinnygirl Chocolate Cupcakes with Chocolate Frosting


So lets start this off with something sweet. I actually made these 2 days ago but honestly they are so moist and just the right amount of sweet and a little salty (I'll explain later) that I would give up Crumbs, Magnolias or any other commercial cupcake for these anytime.


Background: I got this recipe from "The Skinnygirl DISH" by Bethenny Frankel. Some of you guys might recognize the brand or the name, its Bethenny from Bravo's Real Housewives of New York. Personal note: I LOVE LOVE LOVE her and now I LOVE LOVE LOVE this recipe. If you want to find out more about her book, or her Skinnygirl brand go to www.bethenny.com. In the book these are called "Joyful Heart Chocolate Chip Cupcakes" with Chocolate frosting. These are low-fat, and dairy-free (great if you keep kosher and are eating meat for the meal and still want dessert) and if you use oat flour instead of regular flour, it can even be wheat-free. These also make great muffins without the frosting.

Nutrition Facts: Serving size one cupcake (recipe makes 8 cupcakes) *These are calculated by yours truly and not by the book or any other official nutritionist so I can only promise accuracy enough to satisfy my discerning standards
grams: 117; calories: 262 (with 1 tbsp frosting); fat: 10g; saturated fat: 2.5g; carbs: 38.5g; protein: 2g; fiber: 1g; sodium: 458.5 mg; sugars: 27 g

Now for the good stuff...
Cupcake Recipe:
1 cup unsweetened apple sauce
1/2 cup raw sugar *I used granulated splenda so the nutrition facts reflect that
1 teaspoon vanilla extract
1 teaspoon almond extract
1 teaspoon canola oil
3/4 cup oat flour *I only had regular all purpose flour around so I used that instead
1/3 cup unsweetened cocoa powder
2 teaspoons baking powder
1/2 teaspon baking soda
Pinch of cinnamon
2/3 cup mini-chocolate chips *I used large Ghirardhelli 60% cocao bittersweet chocolate chips instead
1. Preheat the oven to 375 degrees F. Spray a muffin or cupcake tin with cooking spray or put liners into a muffin of cupcake tin to make 8 cupcakes
2. In a small bowl, combine the applesauce, sugar, vanilla extract, almond extract, and canola oil. Stir and set aside to allow the sugar crystals to dissolve (if you use the splenda, you might notice a fizzing sound as it dissolves. Never fear it happened to me too and I'm still alive so I'm sure its nothing terrible)
3. In a large bowl, sift together the flour, cocoa powder, baking powder, baking soda, salt and cinnamon. Add the applesauce mixture and stir until everything is combined. Fold in the chocolate chips
4. Using a 3-ounce ice cream scoop or large spoon, portion the batter into the tin to make 8 cupcakes. Bake for 20 minutes, or until the tops are firm to the touch (I have a gas oven and it took 18 min on the timer to cook)
5. Cool completely, remove from the tin, and frost with Chocolate Frosting (recipe follows)

Frosting Recipe:
1 cup nondairy butter *I used Olivio which is olive oil based. I mistakenly got butter that was salted to the frosting I made turned out a little salty. My boyfriend and I actually like it this way since we aren't too big on rich sweets and the mix of salty and sweet is actually a nice blend
4 cups confectioner's sugar *I used only 2.5 cups to curb the calorie and sugar count. In hindsight it might have been good to add the extra sugar to counteract the saltiness of the butter, but in the end all concerned parties were happy with the result so its really a matter of personal preference
2 tablespoons vanilla extract
4 tablespoons soy milk *I used Almond milk because it is lower in fat and calories and I have been told my by doctor that I should try to cut down on all the soy. NOTE: If you get vanilla flavored soy or almond milk instead of original, cut back on the vanilla extract otherwise the flavor will overpower the chocolate flavor
1/2 cup cocoa powder
Pinch of salt

Mix all of the ingredients together in a large bowl and beat with an electric mixer until very smooth. If the frosting is too thick, add a little more soy milk. If it is too thin, refrigerate for 30 minutes to an hour. Frost cupcakes or any cake. Store leftover frosting in the refrigerator
*When I made this frosting, I mixed everything together and added the confectioner's suger in last, gradually. The almond milk was a little watery so I ended up needing to put the frosting in the fridge for an hour. Also because of the Olivio, if you leave the frosting out too long, the olive oil begins to separate and you have to whisk the frosting some more.


Hello World, I'm Hungry

Hello all, (considering I have no followers yet I'm really just talking to myself but thats nothing new)
So I figure in my first post I should probably just give some background on why I decided to do this blog and what are my ultimate goals for it.
First about me, I was born and raised in Arizona but for the past 5 years I have made New York my home. I came here for school and just forgot to leave. Now I have just finished my first year of law school (WOOHOO) and still don't actually have an idea of what I want to do when I grow up. Oh well, as long as there's food in the future I'm not too concerned. I've currently settled down in Forest Hills, Queens and am loving the mix of culture all around the neighborhood. But enough about my location and more about my food history. To sum it all up the best way to describe my food relationship is that its been the longest and most dramatic relationship I have ever had. If you can think of a diet, I've been on it. I love food, I hate food, food makes me happy and it surely makes me want to cry. But through thick and thin (literally) food and I have stuck together. Having given up on any form of dieting, I have come to the conclusion that the only way for food and I to be truly happy is for me to love and respect it as I want it to love and respect my waistline.
And thus, here we have my blog. I decided that the best way for me to have a good relationship for food was for me to document it the way we do any other relationship. There will be happy and sad diary entries, there will be entries where I just need to vent, and there will be lots and lots of pictures (though I can't always guarantee that they will be pretty) and TONS of memorable milestones. To be clear though, this blog isn't just about me trying to eat healthy and telling you how much i hate myself for eating 10 cookies at 2 am (good lord I hope that it doesn't get to that point!). This blog is also about how to cook delicious (wishful thinking much??), exciting and fun dishes on a law student's budget while staying far far away from the ramen noodles and frozen pizzas. I also want this blog to be a place for others, maybe in similar or my EXACT same position, to give advice, comment and share their own experiences so we can all grow as foodies just trying to juggle it all.
There is just one last goal/reason for this blog that I feel I should put out there so later on people aren't confused or put off. My boyfriend and I have been together for several years now, and as he nears the half way point of his medical education and I get distressingly closer to taking the bar, he decided to pop the question. NO NOT THAT QUESTION, he asked me if I would seriously consider converting to Judaism (Some might argue that this is basically the same thing). My boyfriend is pretty orthodox jewish, I, however, am of South Asian origin and was raised by the religion of say please and thank you and don't talk back if you don't want a tight slap to the buttocks. Trust me I have had plenty of friends, family, strangers, etc give me their input on what I should and shouldn't do in this situation. I don't really want the blog to turn into a debate on that. Just know that I told my boyfriend yes, I would consider it, I am happy with my decision and I am doing it for my own reasons that no one else will ever really understand and thats fine. But what does this have to do with a food blog you ask? Well, if I convert and should my boyfriend and I get to that point, that would mean keeping kosher (dun dun dun, jk). This is not to entirely foreign a concept to me since I do go to a jewish law school and plenty of my friends are all different forms of jewish. However the practice is not as easy as it seems and for someone who pretty much lived a year on pepperoni pizza and chicken fettucini alfredo, there are definitely going to be challenges. I am sure I'm not the only person going through something similar to this so I hope my trials and tribulations will help all of you out, and by all means please help me out. Part of my blog I want to dedicate to trying to find ways to make my usual favorites or maybe classics from other cultures kosher friendly. This may also be helpful for any of you out there who are becoming vegan, living with a vegan or just want less milk and dairy in your meals for health reasons.

So anyways, thats my blog, thats me and thats the plan for the journey we are going to take. I really hope you'll join me! Lets taste the world!